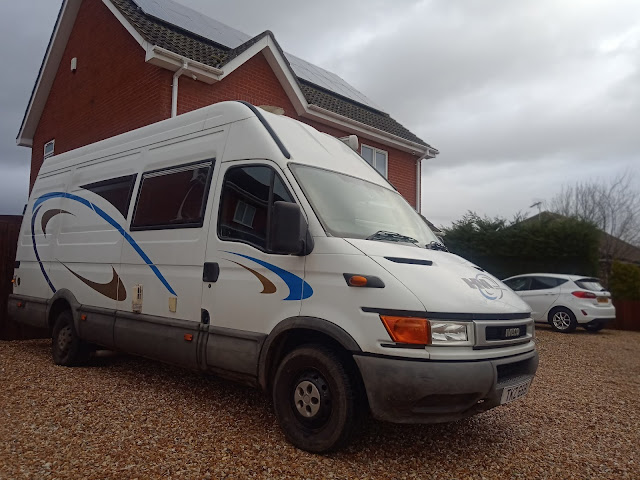
Holy van Bat-van *Work in progress 17/07/22*
This is a work in progress but as the blog is being written at the same time as I am working (for a change), I thought I might as well publish it to make it a live update of sorts. So do pop back in the future to see when I finally give up and set the lot on fire.
 |
| fig 1.0 |
05/10/20
There is no hiding the fact that this is an ageing van and in the UK that means rust is always on the back of your mind.
I knew when I bought it that it had some rust on the underside but as I have dug deeper during my first year of ownership, I just keep on finding more and more of it. The odd hole here and there in the sills and tower bottoms is a nuisance that will have me getting busy with the mig but a noticeable split under the water heater exhaust and a big patch of rust on the drivers side wheel arch worry me a little more.
Well no help will be found from thinking about it, lets go poking about.
Let the poking commence
Whilst sorting the battery out and doing a general tidy up I had a little look at the off side wheel arch in the engine bay. It looked like the brake fluid had leaked at some point causing the paint to strip, exposing the metal to the elements. I had previously chucked on some rust converter and hammerite to protect it but some of this had lifted showing the corrosion was progressing.
When I flicked this away, a thick lump of metal came with it revealing the front off side tyre. Balls!
Further excavation revealed the corrosion was fairly extensive on a pretty sturdy lump of metal too. This is pretty serious and will need sorting sooner rather than later. A bad start.
I pulled the heater out of the van for another reason which gave me the opportunity to look at the bodywork around the exhaust. This turned out to be a part of the inlet/exhaust box which is part of the heater. So on the plus side I didn't need to repair the huge side panel, on the bad side, I had to figure out what to do with the mess that I found under the split paint (or lack there of).
The vans bodywork around this hole was in great condition. Even the exposed metal that hadn't been touched since a good butchering with an angle grinder was still bright and shiny somehow.
Other areas of the van got a good looking at over the months including a number of large holes in the sills which got hammerieted for now. The underside had been treated with a thick body seal at some point in the vans life which was doing a good job of protecting it where the coating hadn't been damaged.
Another hole in the rear bumper which had caused the rear door switch to bugger off inside the cavity behind it was another issue. This area of corrosion was stuffed with soggy horse feed and shit when I bought the van so I am not surprised its a bit rusty round here. This one could be a trickier fix as it is a stamped out sheet.
That aside I was mostly dealing with surface rust. This is easily fixed with rust converter and paint Still more work though.
Now really poke hard this time
06/10/20
Having identified issue areas I had to find a suitable time to get this stuff done. After finding out how much tig welding upside down sucks, I borrowed a mates migatronic 161i to do this and a bit of work on the Corrado. Well that was the thought..
24/05/21
It didn't take me long to figure out this would take a while and the approaching winter was not the time to be messing about with this on a gravel drive. I had managed to have a dig about and cut out a few templates for the holes you can see below
 |
| fig 1.2 |
 |
| fig 1.3 |
I had intended to make up a replacement chassis tower like the one on the left but mine arent even nearly as far gone so will probably just square them off with a bit of angle and suitable drainage.
A fair bit of body seal and paint should keep this area good for a few more years.
Unfortunately winter hit and without any suitable shelter do do the work and my actual job ensuring I wasn't at home much, things ground to a halt. My focus would moved to the much more difficult wheel arches before any repairs happened to the sills.
Earlier on I had found out the off side front wheel arch was completely gone, I suspected the front near side would be a similar story under all of the rubber seal. I was not going to be disappointed.
27/07/21
I found some time to make some faltering progress during the spring of 2021 but didn't really get to make any serious progress toll the summer (when it was still weeing it down apparently).
This bit is going to be very picture heavy but will save you from my waffle.

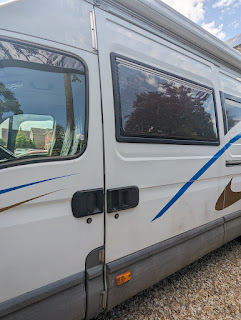
Before I got stuck into the wheel arch I decided to tackle the rear door magnetic latch which had fallen off whilst parked. I thought this would be a tricky chassis skin repair but, after removing the plastic trim, I found it was simply a box standoff which I just cut off, rust converted and painted over. I have no intention of fitting a new magnet and will just blank the hole in the plastic trim.
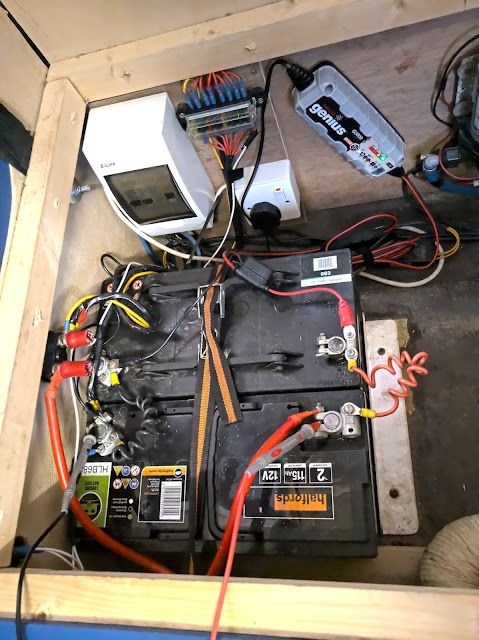
After digging about in the wheel arch (you can see that a bit later) I wondered if I could gain some better access from above if I removed the plastic battery tray. What I found underneath was just more work to do. The battery shelf was not looking very clever.
Whilst I was here; this earth strap had also failed, possibly contributing to my electrical issues. A new strap was ordered and the stud that inevitably sheared was replaced with a bolt and rivnut.
Things don't look great in the wheel arch but the plastic coating is deceptive, hiding many sins.
I removed the plastic wheel arch trim which only extends up as far as the height of the front bumper and peeled away the plastic coating from the "metal". Quite a lot of the wheel arch came with it and I suddenly had quite a lot of sky on show.
A bit more time with an angle grinder and poking about with a screwdriver later and I had the worst of the corrosion removed. It was now clear that the battery tray was not going to survive this.

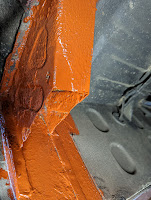
 The battery tray was cut out and all exposed areas were rust converted whilst I admired my new oil filter access.
 |
| fig 2.0 |
 |
| fig2.1 |
 |
| fig2.2 |
A box section brace was cut out and one end tapered so it would sit under the battery tray where the doubled skin extended from the cabin mount out to the front near side headlamp. It also gave me a chance to use the TIG to reassure myself that I could weld before farting metal everywhere with the MIG.
I failed miserably to photograph any of the shelf welding which is no bad thing as it wasn't terribly good. A mix of plug spot welds through drill holes and the odd seam weld where appropriate did the job.
I refit the lower wheel arch liner and measured the gap I needed to fill. I then marked out what you cvan see above which was segmented and roughly bent to for the curve required.
Another not bad fit. I could now drill it and weld through prime the inaccessible side (something I had been doing a lot of adding some fun fumes to my welding jobs) before hot glueing it all together.
A had some isuse getting a good arch due to rusty van. The plug welds went well but the seem on the right was messy at best Too much heat and I was blowing holes in the van so spot and move was employed to build up some metal before daring short burst to actually get some penetration. There were more plugs going to the underside of the shelf as well as a couple into the inner wing on the outboard end.
First things were rough shaped in the shed before the front tabs and inner corner were plug welded in. This was then followed by the beating of its life as I shaped the lining with a deadblow and lump hammer tickle-fest combo. I then laced up the aft edge plug holes using a jacking handle to hold things in place whilst I farted metal into the holes.
Once I was done making a racket and the flames had died down I gave everything a corrosion resistant primer then liberally seam sealed the area.
Finally a coat of satin black (still wet as pictured) went on. I have some stone chip coming in the post to help protect this area further later.
The battery and all of the wiring was re installed making things look all untidy again. I will have to look at this power supply mess another day.
The van looked like hell with 8 months of bird shit and algae all over it so a bath was my next step before getting to that off side front corner.
01/08/21
It was time to turn to side B, or in this case the off side front wheel arch.
This was the place that first caught my eye, when I noticed more tyre in the engine compartment than there should have been.
A littler poking about showed that there was quite a bit of metal in the area which had returned to its base state and what was worse, it was all quite hefty looking.
As you can see on the right, at some point the brake master had leaked causing paint removal and corrosion in the area. TA previous owner had gone to the trouble of wax oiling over the problem area which may have saved further moisture ingress but it also masked the problem.
The hole aside, you could tell that the area around the cab mount wasn't in great shape. This extends forward, supporting the off side wing, something it probably wasn't doing very well anymore.
Poking, probing and cutting my way along I found that there wasn't a lot of good metal in this area with the hole getting alarmingly big and the memory of what was there getting increasingly distant.
Even the components in this area were a pig to remove but they had to go as I was planning to throw quite a lot of molten metal about.
By the time I was done cutting, there was quite a lot of space to work in. All that was needed now was to tidy up the edges and prepare to weld in some new metal.
By the time I was done cutting, there was quite a lot of space to work in. All that was needed now was to tidy up the edges and prepare to weld in some new metal.
More time back home came and so did the rain. I was however fortunate enough to get some dry days when I wasn't needed else where so progress has been made.
A channel was formed out of sheet, slotted into the existing chassis rail and spot welded into place. This would act as a better foundation for what was coming next.
I then cut out and shaped some box section in much the same manner as the other side (see fig 2.2) and welded this in at either end. Nothing too wild, just enough to hold it in place.
This made up the foundation for the shelf which has substantially less weight on it than the inboard side.
 |
| fig 4.2 |
 |
| fig4.3 |
 |
| fig 4.4 |
The shelf could now be welded in around its perimeter along with a few plug welds in over lapping areas and onto those little feet. A fair bit of primer later and a good helping of seam sealer and everything looks pretty neat.
The opportunity was taken here to refit the windscreen wash tank so an anchor nut, in this case a rivnut, could be installed into the new shelf.
18/09/21
Time to button up that wheel arch. I managed to stretch this out of a weeks worth of evenings, a Friday afternoon and most of Saturday.
First I fairinged off the support bracket down to the upper limit of the plastic wheel arch in exactly the same way as the left side although I did segment the bend as bit more this time.
 |
| fig 5.0 |
 |
| fig 5.1 |
I wanted to finish the front of the wheel arch first but one of the wholes would need addressing before I could do that for which the wobbly bit of metal if fig 5.2 was fabricated.
That should be the only external patch in this area and as you can see there is a small hole behind it that will need filling from the inside.
 |
| fig 5.2 |
Now I could put the final bit of the front wheel arch in which was achieved with spot welds initially then a few seem welds where the metal was good, mostly as it was a pleasure to do compared to welding to tinfoil. I did use a jack to help hold the metal in place.
I was a bit disappointed to see I had yet again, not given myself enough material to fill in the outer edge properly but not entirely surprised.
06/10/21
 |
| fig 5.3 |
With all of the metal squirted into various gaps it was a simple case of surface finish restoration with primer, paint, seam sealer and finally stone chip.
 |
| fig 5.4 |
 |
| fig 5.5 |
A final coating of stone chip focussed mainly on the repair areas made everything look suitably messy after my super "tidy" job. I will hot wax oil all of this later as I am not wild about the stone chip.
13/10/21
Now I could turn to the two towers forward and aft of the fuel tank that I first started looking into back in fig 1.2-1.3. I first tried removing the fuel tank but the straps are well and truly rusted on. Rather than destroy them removing them I opted to instead re-root the filler nozzle out of the front tower and then to use a steel shield whilst welding to help reduce the chance of starting a pretty devastating fire.
 |
| fig 6.0 |
 |
| fig 6.1 |
I didn't kick the arse out of these, keeping them simple and making up for lack of forming with a suitable amount of filler.
In fact I was so underwhelmed by these I didn't even bother taking many photographs it seems.
 |
| fig 6.2 |
01/03/22
 |
| fig 7.0 |
 |
| fig 7.1 |
 |
| fig 8.0 |
Back home again and I got myself back under the van. With lads to do and racing already missed I managed to smash out the last of the work in two days then off to the MOT center I went again. Yet again I returned with a long list of jobs to do including all of the rest of the outriggers that they for some reason didn't snag the last time.
It does amaze me that I can buy a van with gaping holes in it and a brand new MOT but the slightest hint of crispy metal and I'm back welding again.
 |
| fig 8.1 |
Grumblings aside, I decided to completely replace all of the outriggers regardless of condition (I walked this back as I could get away with doing half of one and I was running out of steel again) as this was much easier than patching an existing outrigger.
I did however take the time to really go to town on getting the template right. I took measurements based off of the right rear wheel arch rear outrigger and came up with a design that would be simple to make (I don't have a sheet metal bender or any fancy forming tools) and would be quick. Also it needed to be welded to some fairly crap metal in some places so I would be looking to spot weld through drill holes, preferably through old metal to new but this wasn't going to be very likely with an outrigger.
 |
| fig 8.2 |
 |
| fig 8.3 |
 |
| fig 8.4 |
The other 2 were drilled, formed, drilled, painted and zapped on in due course along with the sneaky little half outrigger.
As with the previous repairs, the outriggers were then primed, painted and sealed as required. a small floor patch was needed for the rear right, this was achieved from underneath, using some foil to protect the wooden floor during welding, along side taking my time to reduce heat build up.
As with the previous repairs, the outriggers were then primed, painted and sealed as required. a small floor patch was needed for the rear right, this was achieved from underneath, using some foil to protect the wooden floor during welding, along side taking my time to reduce heat build up.
Some new brake lines and the brake balance valve was serviced as you can see in fig 8.5 meaning the van was actually ready for a retest in time. Good job I booked some "holiday".
 |
| fig 8.5 |


Comments
Post a Comment